Bundle Builder
Let customers pick multiple products and earn automatic discounts at checkout — the more items they add, the bigger the discount they unlock.
The Bundle Builder section lets your customers pick multiple products and earn an automatic discount at checkout — the more items they add, the bigger the discount they unlock. Products are shown in a grid on the left, and a live sidebar on the right keeps track of what has been added, shows how close the customer is to the next discount level, and handles checkout.
Critical: Three Steps Must Be Done Before the Bundle Works
This section will not work correctly if you skip any of the three steps below. The theme cannot create or apply discounts on its own. It works by sending a discount code to Shopify's checkout page. If that code does not exist in your Shopify admin, or if the settings do not match, the customer will not receive any discount — even if the progress bar shows they have unlocked one.
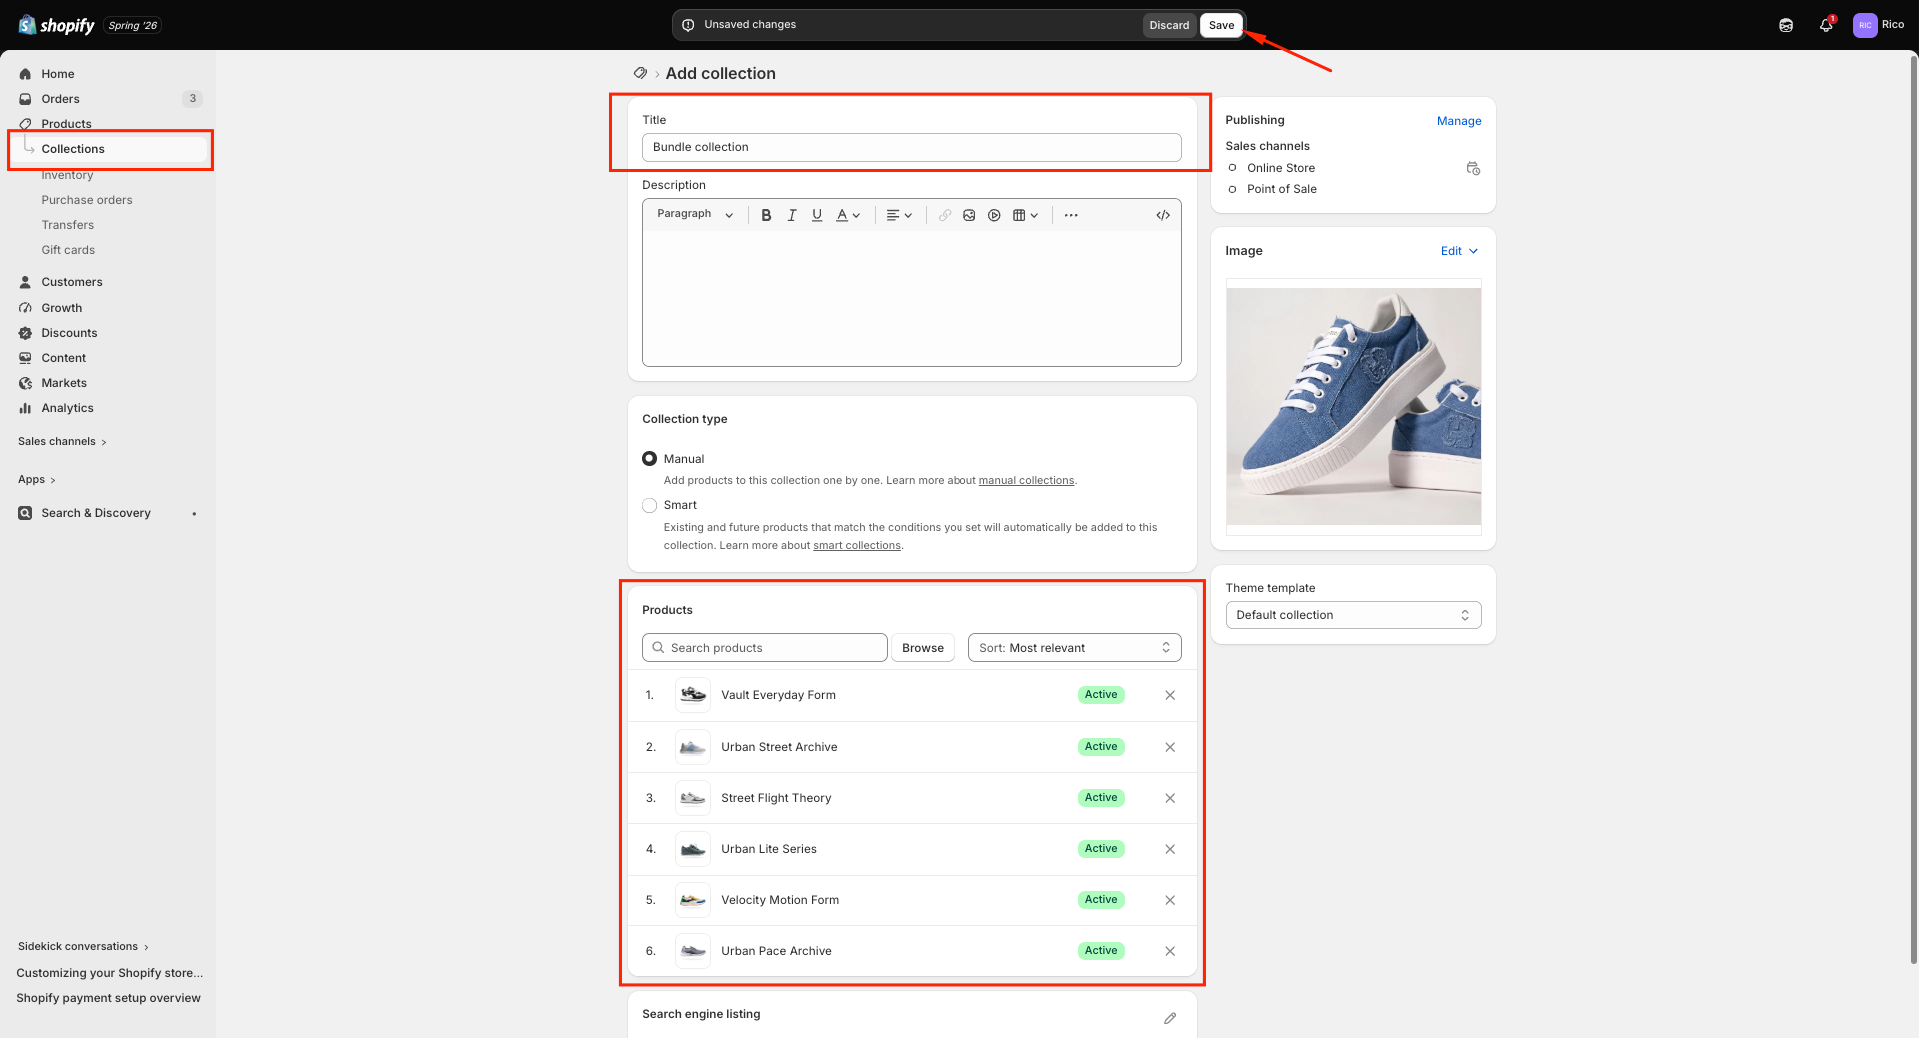
Step 1: Create a Collection in Shopify
First, group all the products you want to be available in the bundle into a single Shopify collection.
- Go to Shopify Admin → Products → Collections.
- Click Create collection.
- Give it a clear name (e.g. "Bundle Products").
- Add all the products you want customers to choose from.
- Save the collection.
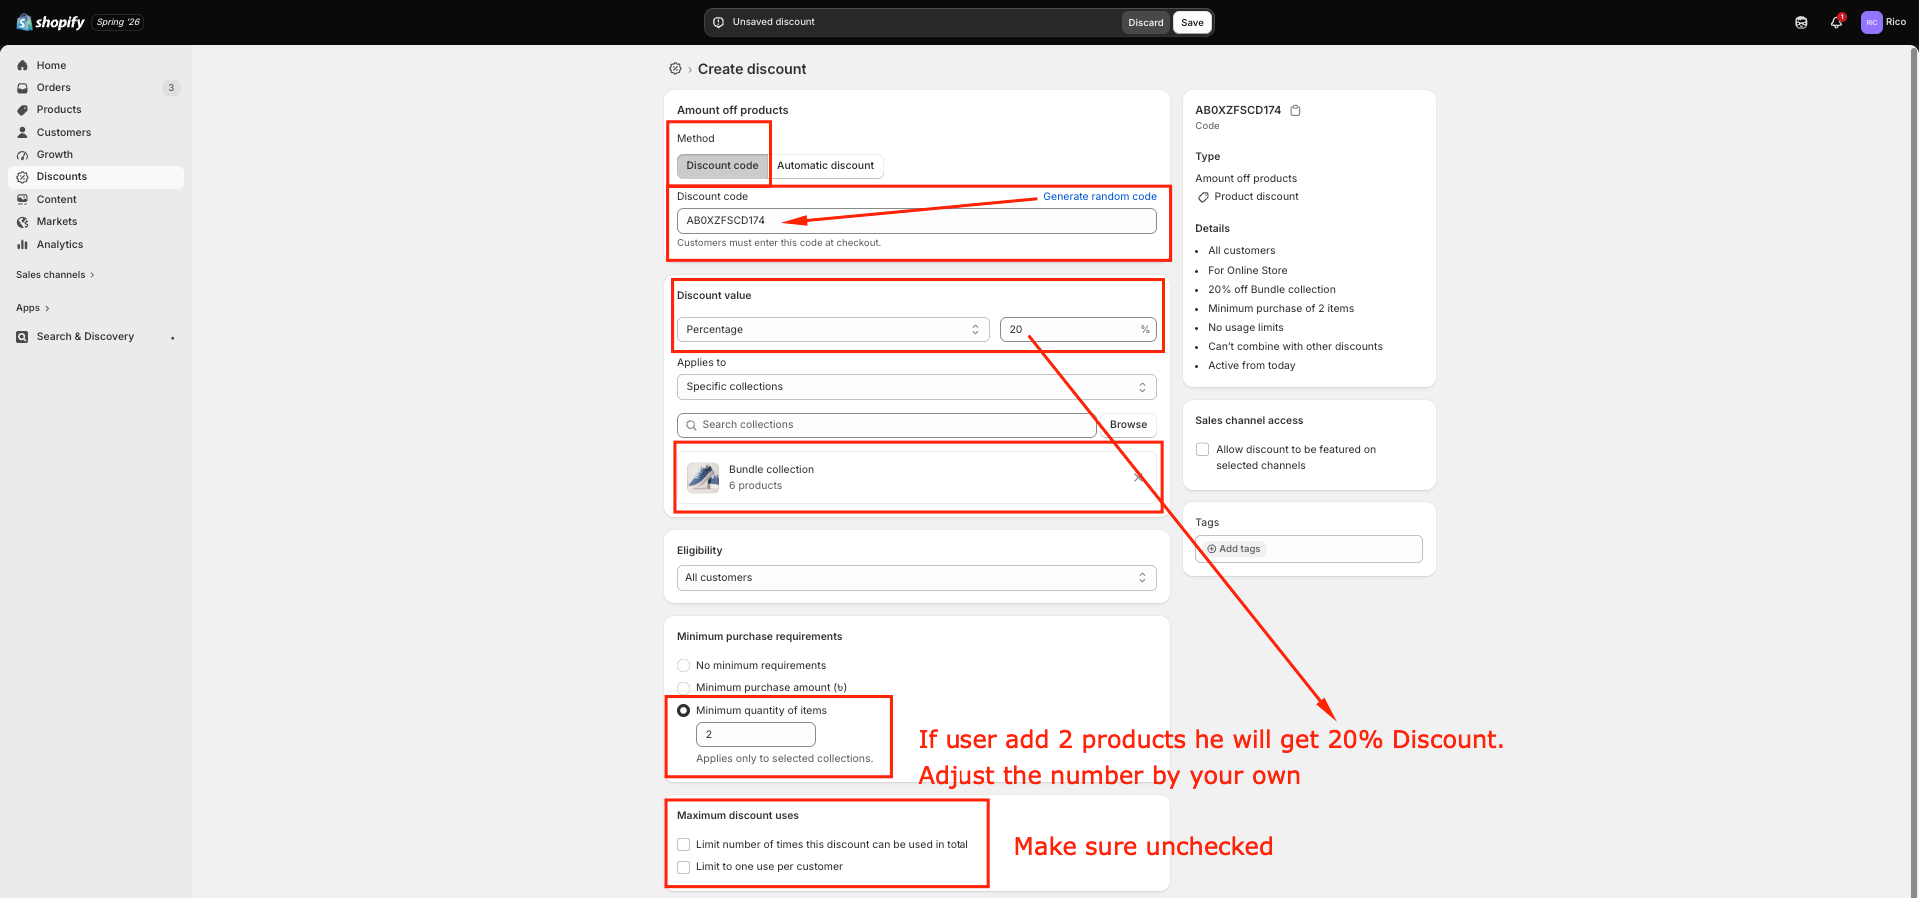
Step 2: Create the Discount Codes in Shopify Admin
You need to create one discount code for each tier you plan to offer. For example, if you want three tiers (2 items, 3 items, 5 items), you need to create three separate discount codes.
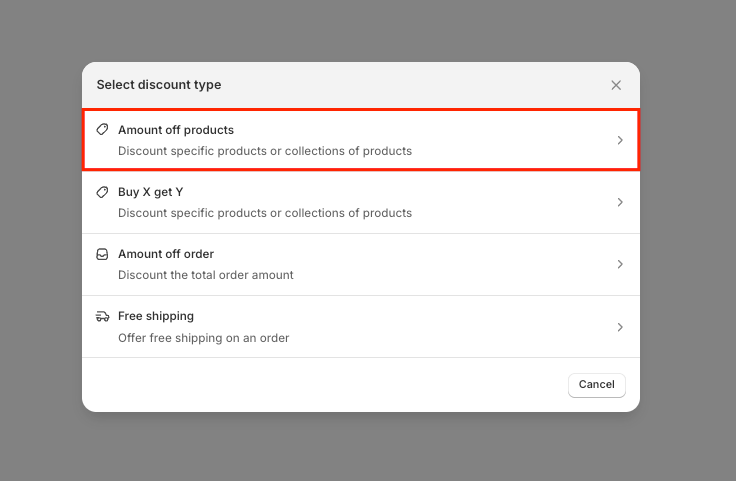
For each tier, go to: Shopify Admin → Discounts → Create discount → Amount off products → Discount code.
Set it up like this
- Discount type: Choose Discount code.
- Code: Click "Generate" or type your own code (e.g. BUNDLE20).
- Type: Select Percentage.
- Discount value: Enter the percentage (e.g. 20).
- Applies to: Select your bundle collection.
- Minimum quantity: Set the minimum number of items for this tier (e.g. 2).
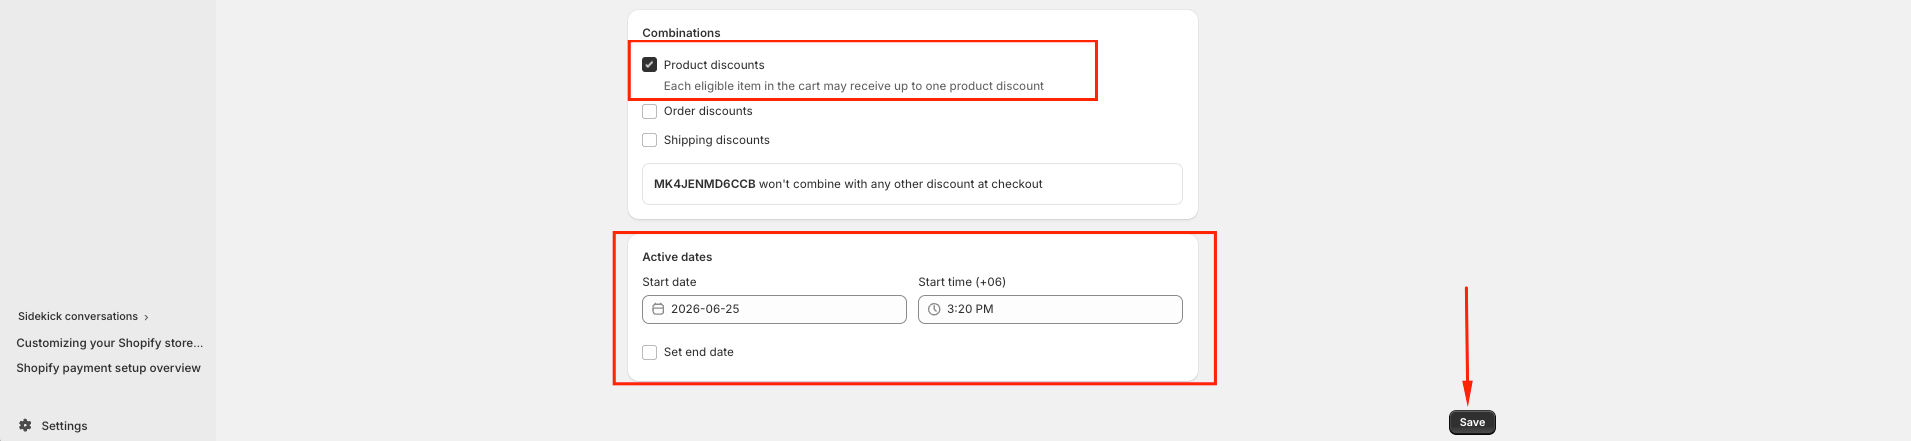
- Usage limit: Set to unlimited — do NOT set it to one per customer.
- Active dates: Set a start date and leave "Set end date" unchecked.

Repeat this for every tier you want to offer. Here is an example of what a full set of tiers could look like:
Example Tiers
- BUNDLE20 — 20% off, minimum 2 items
- BUNDLE30 — 30% off, minimum 3 items
- BUNDLE50 — 50% off, minimum 5 items
These are just examples — use whatever codes and percentages you want. The same product can be added to the bundle twice only if it has a different variant (for example, a different size or color).
Step 3: Enter the Same Codes in the Theme Editor
Once the discount codes are live in Shopify, you need to tell the theme about them.
- Open the Theme Editor (Shopify Admin → Online Store → Themes → Customize).
- Find the Bundle Builder section.
- For each tier, add a Discount Tier block.
- In each block, set the Minimum Items, Discount Percent, and Discount Code to exactly match what you set in Step 2.
The values must match exactly. If the discount code in the theme does not match the one in Shopify Admin, the discount will not apply at checkout. Once all three steps are done, the bundle will work. When a customer reaches a tier, the matching discount code is automatically sent to the Shopify checkout page and the discount is applied.
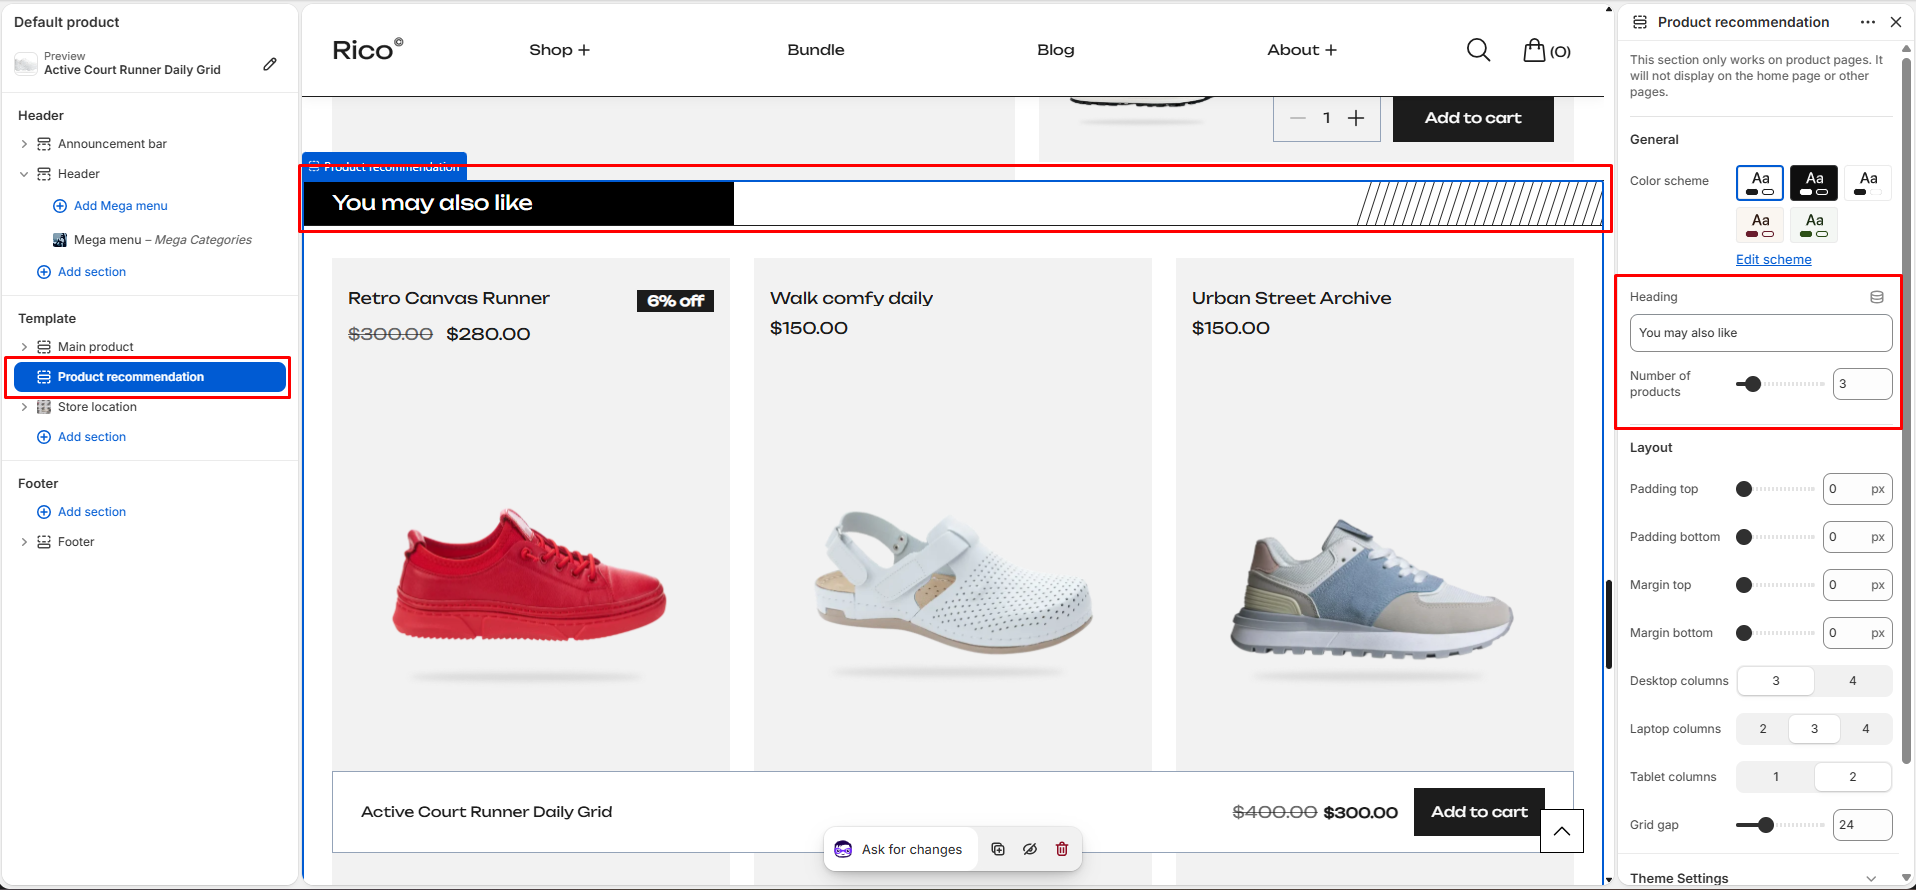
How to Edit the Bundle Builder Section
Section Settings
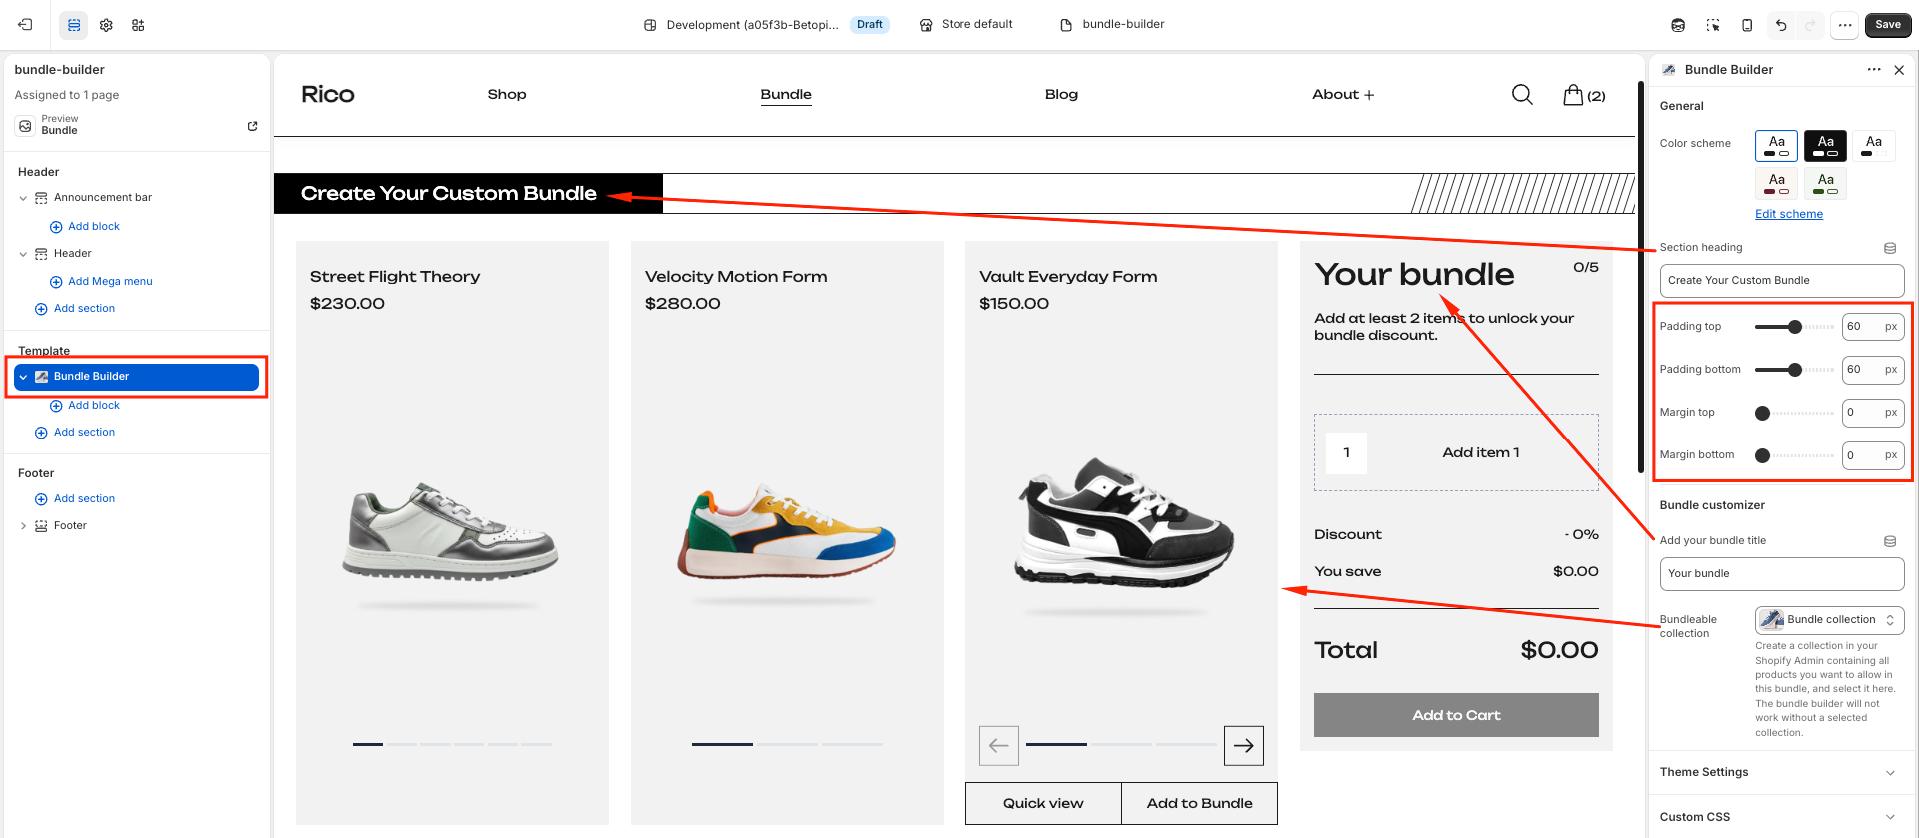
- Color Scheme: Choose a color scheme that matches the rest of your store. This controls the background color, text color, and borders across the whole section.
- Heading: An optional title shown above the bundle builder. Use it to introduce the offer — for example, "Build Your Bundle & Save".
- Bundle Title: The title shown inside the sidebar panel (the part that tracks what the customer has added). If you leave it blank, the space is hidden automatically.
- Bundle Collection: Pick the collection you created in Step 1. Only products from this collection will appear in the bundle grid. If no collection is chosen, placeholder cards are shown instead so the layout does not look broken during setup.
- Layout & Spacing: Adjust the space around the section using the padding (inside space) and margin (outside space) controls. The section automatically reduces spacing on smaller screens, so you only need to set the desktop value.
Discount Tier Blocks
Each Discount Tier block sets one level of discount. You can add as many tiers as you like, up to the block limit. This is where you enter the codes you created in Step 2.
- Minimum Items: How many items a customer needs to add before this discount unlocks. The highest number you set across all your tiers also becomes the maximum number of items allowed in the bundle.
- Discount Percent: The percentage discount the customer gets when they reach this tier. This number is shown on the progress bar in the sidebar.
- Discount Code: The exact discount code from your Shopify Admin (Step 2). This must match perfectly — same letters, same capitalisation.
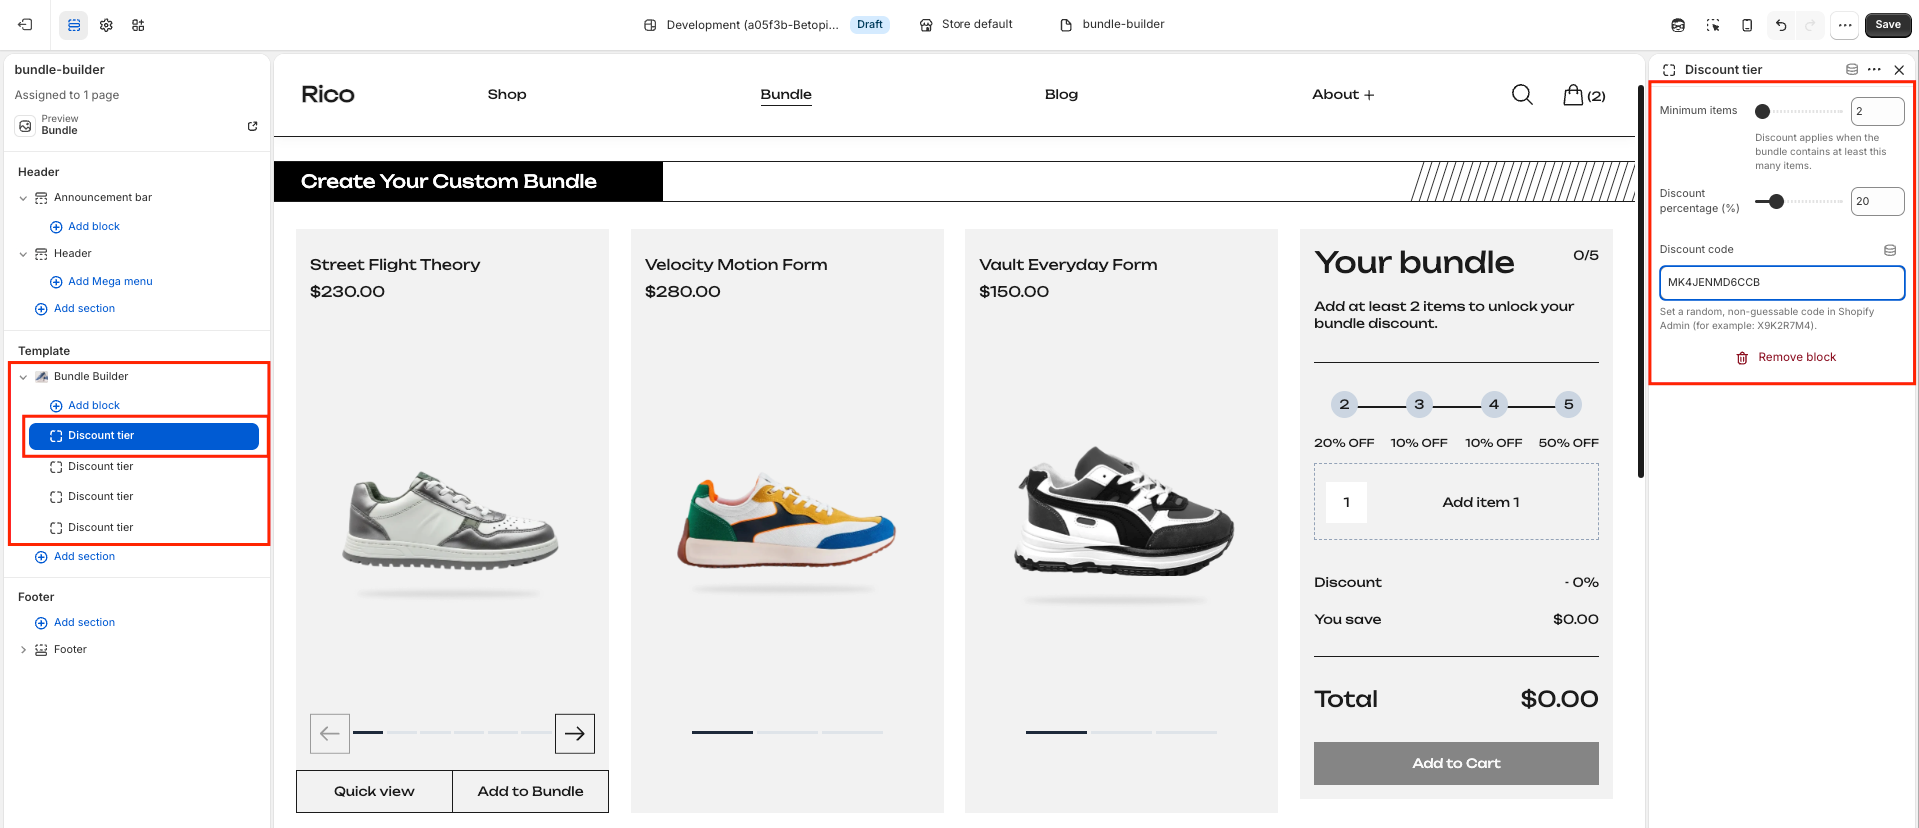
Tiers are sorted automatically by item count. You do not need to add them in any particular order.
Progress Tracker
The sidebar shows a step-by-step progress bar built from your configured tiers. As a customer adds items, the bar fills up and steps turn green. Each step shows the item count and the discount percentage available at that level.
A step can be in one of three states
- Not yet reached: Grey circle — discount not unlocked yet.
- Currently active: Green circle — this discount is now applied.
- Passed: Green circle with a checkmark (on desktop) or a number (on mobile).
Best Practices
Do
- Complete all three setup steps (collection, discount codes, theme tiers) before publishing the bundle section to customers.
- After setup, do a test purchase for each tier to make sure the correct discount applies at checkout.
- When creating the discount code in Shopify, set the usage limit to unlimited — the same code is sent to every customer via the checkout link, so a limited-use code will stop working after a few orders.
- Keep the bundle title short so it does not get cut off on small phone screens.
- Make each tier's discount noticeably bigger than the last (e.g. 20% → 30% → 50%) so customers are motivated to add more items.
Don't
- Leave the Discount Code field empty in a tier block — if there is no code, nothing gets sent to checkout and the customer pays full price even if the progress bar shows a discount.
- Set the Shopify discount to "limit to one use per customer" — since all customers share the same code, it will stop working for anyone after the first use.
- Set an end date on the discount code in Shopify — if the code expires, the bundle will silently stop applying discounts at checkout.
- Give two tier blocks the same minimum item count — only one will ever be active and the other is wasted.
- Add unrelated products to the bundle collection — customers will see them in the grid and may add them expecting the bundle discount to apply.