Flash Sale Timer
Display a two-column promotional section with a countdown timer to create urgency and drive conversions during limited-time sales.
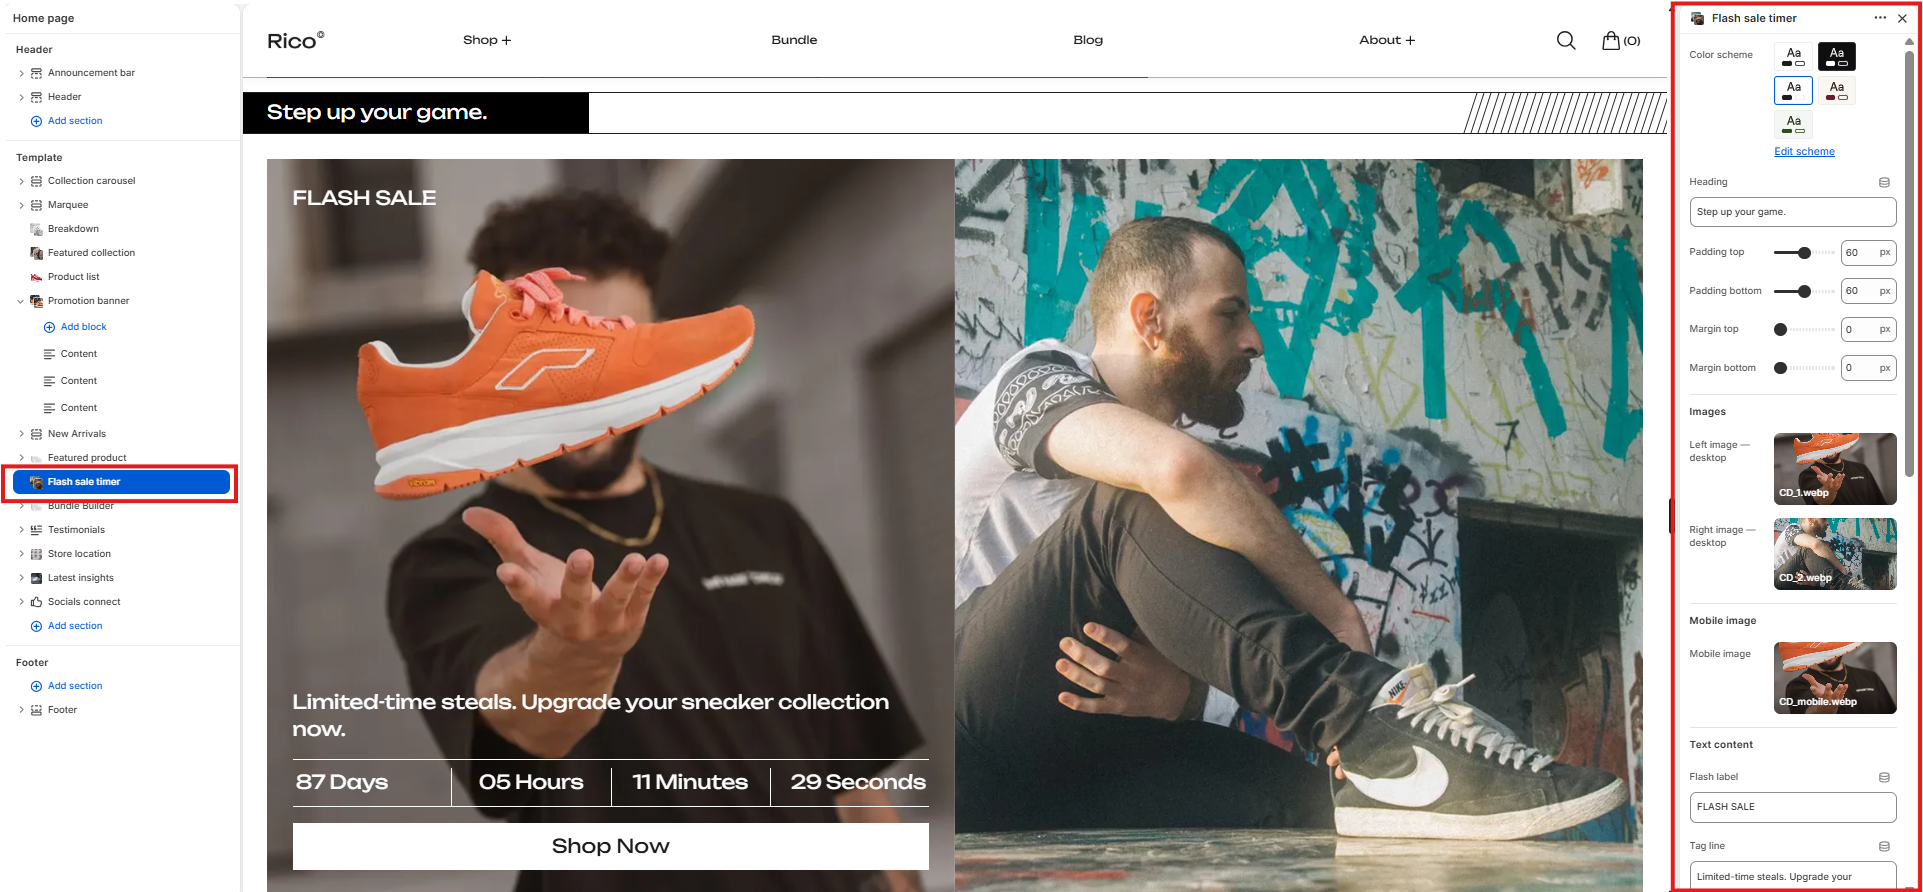
The Flash Sale Timer section is a two-column promotional layout designed to create urgency and drive conversions during limited-time sales and campaigns. The left column displays a promotional image with an overlaid flash label, tagline, countdown timer, and call-to-action button. The right column displays a secondary supporting image. The section supports separate desktop and mobile images for the left column and scales spacing responsively across all device sizes.

How to Edit the Flash Sale Timer Section
- From your Shopify admin, go to Online Store → Themes.
- Click Customize on the active theme.
- Select the Flash Sale Timer section from the left sidebar.
- Adjust the settings according to your preferences.
- Click Save to apply your changes.
Section Settings
General
- Color Scheme: Select a color scheme applied to the section.
- Heading: Add an optional section heading displayed above the two-column layout.
- Padding Top: Controls the top padding of the section. Scales automatically across desktop, laptop, tablet, and mobile.
- Padding Bottom: Controls the bottom padding of the section. Scales automatically across desktop, laptop, tablet, and mobile.
- Margin Top: Controls the spacing above the section. Scales automatically across desktop, laptop, tablet, and mobile.
- Margin Bottom: Controls the spacing below the section. Scales automatically across desktop, laptop, tablet, and mobile.
Content
- Left Image: Upload the primary promotional image displayed in the left column on desktop.
- Right Image: Upload the supporting image displayed in the right column.
- Left Image (Mobile): Upload a separate image for the left column optimized for mobile devices. If left blank, the desktop left image is used as a fallback.
- Flash Label: Enter a short promotional label displayed as an overlay on the left image. Example: Flash Sale, Limited Offer.
- Tagline: Enter a short supporting message displayed above the countdown timer.
- CTA Label: Enter the text for the call-to-action button.
- CTA URL: Assign a destination URL for the call-to-action button.
Countdown Timer Settings
End Date & Time
- Month: Select the month the sale ends.
- Day: Enter the day the sale ends.
- Year: Enter the year the sale ends.
- Hour: Select the hour the sale ends (24-hour format).
- Minute: Select the minute the sale ends.
Timer Labels
- Days Label: Customize the label displayed below the days counter. Default: Days.
- Hours Label: Customize the label displayed below the hours counter. Default: Hours.
- Minutes Label: Customize the label displayed below the minutes counter. Default: Minutes.
- Seconds Label: Customize the label displayed below the seconds counter. Default: Seconds.

Fallback Behaviour
If no image is assigned to the left or right column, a placeholder graphic is displayed automatically. This ensures the section remains visually structured during store setup and content management.
Best Practices
Do
- Use high-quality promotional images for both columns.
- Upload a separate mobile image for the left column to ensure optimal display on small screens.
- Keep the flash label and tagline short and impactful.
- Set a clear and realistic sale end date to build genuine urgency.
- Link the CTA button directly to the relevant sale collection or landing page.
Don't
- Use low-resolution images that appear blurry on large screens.
- Set a sale end date that has already passed.
- Use overly long flash labels or taglines that overlap the image content.
- Leave the CTA button without a destination URL.
- Use the section without updating the countdown timer end date for each new promotion.